coiski 101: Using the Depth Effect Feature on the iPhone 7 Plus
The iPhone 7 Plus’ ‘Portrait Depth Effect’ feature has the ability to effectively punch in on a subject and capture alluring photos that have a beautiful bokeh. These blurred backgrounds are a quality that both professional and amateurs adore, and before the release of the iPhone 7, would need a DSLR camera to accomplish.
In today’s coiski 101 tutorial, we’re going to walk through the do’s-and-don’t’s in achieving successful results using the iPhone’s new Portrait mode.
Note: All photos taken are not edited.
Step 1:
If you haven’t already, update your iPhone 7 Plus to iOS 10.1.1.
Step 2:
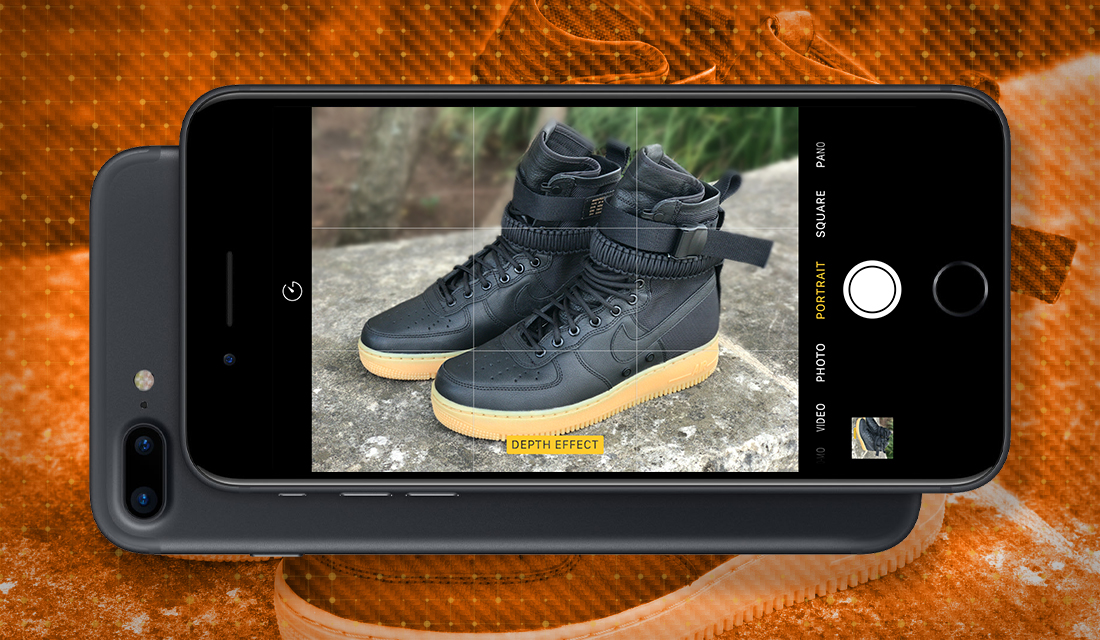
Access the Camera app and slide over from Photo to Portrait mode.

iPhone 7 Plus ‘Portrait Depth Effect’
Step 3:
Make sure your subject is at least within eight feet of you.
Step 4:
Make sure you have adequate light to take your photo. *Your iPhone will notify you if you don’t have sufficient light to use this feature.
Step 5:
Tap on your subject to lock the focus and exposure.
Step 6:
Finally, press the shutter button to capture your moment. *Notice the detail and captivating bokeh.

iPhone 7 Plus picture taken using the ‘Portrait Depth Effect’
Here are some comparison photos using the iPhone’s previous photo modes, such as Photo 1x and Photo 2x.

iPhone 7 Plus photo taken in 1x Photo Mode

iPhone 7 Plus photo taken in 2x Photo Mode
RELATED: coiski 101: How to Take the Ideal Photo on Your Smartphone

